Building a touring bike when you live in a small town in China
Cycling is still very much a way of life in China. There are bikes literally rolling down every street, with all manner of cyclists on board, from grandpas going about their daily business, through delivery boys loaded to the max, to women dressed in office apparel including stilettos. So you’d think building a bike to ride from Beijing to Melbourne would be a breeze.
Not so. In the Dali region I’ve managed to isolate a total of three bicycle shops: two sell stock Chinese models of Giant and Merida bikes with minimal spares and accessories, and one that has some spare parts and a sort-of workshop as well as higher end models of mountain bikes.
Even though the majority of bike parts are manufactured in China, I’ve ended up importing much of the needed kit from the UK from online bike stores (Wiggle and Chain Reaction Cycles) which will ship for free and the prices are VAT-exempt. One thing I failed to take into consideration initially was import duty if the value of the package is over 1000RMB (~AUD$150), by splitting the goods into smaller consignments you can avoid this. Un-registered parcels do get delivered in China but can take up to an extra three weeks to arrive, but some don’t arrive at all. I had two orders from Wiggle dispatched on the same day, the registered one arrived within 5 days, the unregistered one took more than 3 weeks to arrive. Two others, from Chain Reaction didn’t arrive at all and I had to re-order the parts. It’s worth the peace of mind to pay the extra cash to get the parcels delivered via a traceable means.
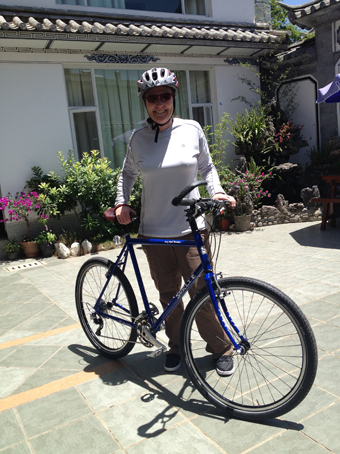
As this tour is quite long (a year or more) and because I like to know how things work, I decided I would put the bike together myself. With the help of the Park Tools Big Blue Book of Bicycle Repair II, the internet, and a fair amount of trial and error, I managed to construct a really good bike. No one was more surprised than me.
I do recommend that you read as much as possible about how the parts fit together before you attempt to fit them, and go easy on the parts when you do. I was nervous that I would break parts and have to re-order them from overseas, so I was very gentle and incremental in my approach. There are a few very specific tools you will need when you are building your bike: a cassette tool for fitting the rear cassette, a bottom bracket tool, and a torque wrench to ensure you don’t over- or under-tighten any of the fixtures.
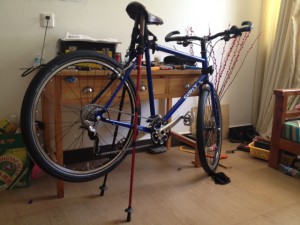
A bike stand, specific to bike maintenance, would have been really handy, and I wish I’d shelled out the money for one. I found myself working at difficult angles and trying to balance the partially built bike on my head and shoulders when I was adjusting the gears (this is not comfortable, trust me). In the end I did fashion a kind-of work stand out of two walking poles and a bungy cord to finish tuning the gears, but this was out of desperation and not ideal at all.
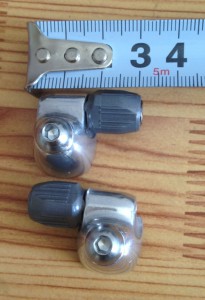
I also found that there are some tiny parts that may be needed to finish the bike. In the case of the Surly LHT, if you are using gear levers mounted on the handlebars, you will need two “Downtube Gear Cable Stops” to secure the gear cables. I had to wait two weeks before I could finish the build because I didn’t know these were required, and I couldn’t source them locally so I had to import them from the UK. If you don’t have a local bike shop that you can consult, like me, check pictures of completed stock bikes on the internet.
Jane’s Surly LHT Specs
- Surly LHT Frame and Fork (2011)
- Wheels: Mavic XC717 + XTR hub + DTR Swiss spokes
- Shimano FC-M770 10 Speed XT Chainset – 170mm 4-Bolt 68/73mm Shell (42.32.24)
- Shimano XT Cassette 10 Speed M771 (11-34t)
- Shimano XT Trekking Brake Levers T780 – V-Brakes – Pair
- Shimano XTR Chain 10 Speed M980
- Shimano XT V-Brake T780 – Front & Rear
- Shimano XT Front Mech Top Swing 10sp M770 – 28.6/34.9mm – Dual Pull
- Shimano XT Rear Derailleur 10sp M780 – GS – Top Normal
- Shimano XT/SLX Bottom Bracket Cups M770/M660 – Pair – 68/73mm
- Shimano XT Shifters 10sp M780 Multi Release – Pair
- Shimano Downtube Gear Cable Stops – Pair
- Ritchey Headsets Spacers Alloy Headset Spacers 10mm 1.1/8″ (Black)
- Ritchey Comp V2 Headset 1.1/8″ (Black)
- FSA XC-270 Riser Bar – 25.4mm 600mm (Black)
- Halo XL Hex Key Skewer Set (White)
- RaceFace Turbine Seatpost – 27.2mm 400mm Black
- Ritchey Adjustable Road Stem – 100mm Black 1.1/8″ 25.4 Clamp
- Shimano A530 SPD Single Sided Touring Pedals (Silver)
- Brooks B17S Saddle
- GC3 Handlebar grips
- Schwalbe Marathon Dureme Evolution DD Folding MTB Tyre (Black 26″x2.00)
- Schwalbe MTB Inner Tube (Presta 26″x1.5-2.5)
Attachments for touring
- SKS Chromoplastic Mudguards – Black – MTB Narrow – 55mm
- Tubus Ergo Lowrider Front Rack (Black)
- Tubus Cargo Rear Rack (Black 26″)
- Ortlieb Ultimate 5 Plus Handlebar Bag (Hazel/Black)
- Ortlieb Back Roller Plus Panniers (Hazel/Black)
- Ortlieb Front Roller Plus Panniers (Hazel/Black)
- Ortlieb Map Case For Ultimate 2-5 (Transparent)
- Knog N.E.R.D. 12 Function Wireless Cycle Computer (Red )
- Lezyne Energy Caddy Nutrition Bag (Grey )
- Topeak Road Morph pump with gauge
- Kryptonite KryptoFlex 7 foot cable
- Giant generic bike lock
- Clarks Polycarbonate Water Bottle Cages
Next page:this is the last page in this section
Building a touring bike:
Is our information useful????
This website has been created to support our fundraising efforts for research into a cure for Melanoma. If you found this information useful, please consider making a small donation.


Hello,
it’s nice to read your blog.
And very helpfull as I’m planning to tour through China coming year.
I have one question in regard to this.
How do you pack your stuff (bags?) and where did you get those?
have a nice tour
Hi Siebe,
My apologies, I haven’t gotten to writing about panniers and packing them as yet. I bought a full set of Ortlieb waterproof panniers from the UK, they are attached to the bike using Tubus racks. They have a really simple click-type attachment system, so they are easy to put onto the bike and take off again.
The key to packing your stuff into panniers is to keep the weight even between the left and right sides of the bike, otherwise you will have to compensate when you are riding. I did a few practice packs, using a a set of scales, until I’d settled on a basically evenly distributed load. I now stick to that when I’m on the road.
Hope that helps,
Jane